A budget guide to indoor riding during COVID-19

Like so many other devoted road cyclists around the world, I’m now focused on indoor riding during COVID-19, so I thought I’d share my tips on how to do this on a budget. Indoor trainers have evolved in the last few years to become very sophisticated with price tags to match, but you don’t have to fork out thousands.
My preference is to ride outdoors but right now I’ve decided to stay home as much as possible to protect the community and to do my bit to stop the spread of COVID-19. One major benefit of indoor trainers is time efficiency – one hour spent on a trainer is the equivalent of two hours on the road because there’s no coasting so you’re constantly putting in the effort. Although I have more time than usual at the moment because there’s no commuting or going out.
There are plenty of options for indoor trainers from the very basic magnetic driven trainers for around AU$139 to the fancier/high tech versions like the popular Wahoo Kickr which retails for AU$1,599. Plus of course many options in between. Head to your nearest bike shop to find out more, or given the current situation give them a call first.
My setup
I’m fortunate enough to have a garage that never houses a car. It houses all manner of things including our bikes. Initially, I used the trainer in our lounge room so I could watch TV and many of my friends set their bike trainers up indoors so you don’t need a garage to use one.
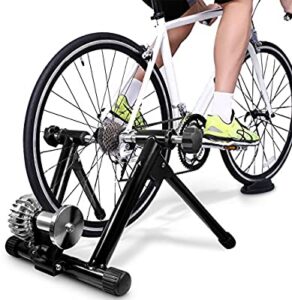
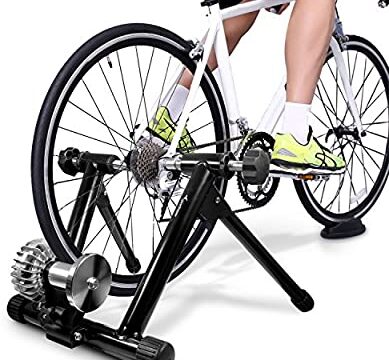
I use a fairly basic magnetic indoor trainer. With this style of trainer, your back wheel is lifted off the ground and locked into a frame. As the wheel rotates the trainer’s magnetic mechanism provides resistance. Most of the resistance comes from you changing gears while you’re pedalling which gives you an authentic riding experience.
I would also recommend that you invest in a proper mat to go under the whole setup and a block to house the front wheel. Some trainers actually come with a mat and block.
I use my old road bike on the trainer so I can leave it set up. You could easily achieve the same thing if you only own one bike but if you’ve got a spare it’s easier to keep your best road bike ready to go without the hassles involved in setting up a trainer. My bike has calliper brakes so it’s compatible with most basic trainers, but if your bike has disc brakes and a thru-axle you might need an adaptor.
I also have an extra back wheel complete with a cassette and a special indoor trainer tyre. The indoor trainer tyre is very hard-wearing because the mechanism on the trainer can wear down soft road tyres. I learnt this the hard way with one of my first attempts at using the trainer resulted in me burning rubber literally and wearing down a perfectly good road tyre. The only detraction of the trainer tyre is you can’t use it on the road so I have a special back wheel setup to use only on the trainer complete with cassette so that I can easily switch the back wheel without having to change the tyre. The same thing could, of course, be achieved just by changing the tyre.
Trainer DVD
When I first started using the wind trainer I used to watch TV and found that I could only handle about 20 minutes at a time without getting very bored, plus I wasn’t putting in a huge effort. Then I discovered Spinervals. These are a series of DVDs produced by an American guy called Troy Jacobson and they are designed to be used with indoor trainers and road bikes. I have two of them and both are about 40 minutes long. It’s a bit like doing a spin class at the gym. Coach Troy tells you what gear to have your bike in but keeps it fairly simple so you’re not constantly changing.
Coach Troy talks you through a complete workout, and believe me, you really sweat and get your heart pumping. I know this because I have my Garmin computer monitoring my cadence and heart rate. In fact, Coach Troy refers to cadence and heart rate which gives you a good idea of how you’re tracking.
I play these DVDs on a cheapo DVD player and an old analogue TV that would otherwise have gone to the rubbish tip. So it’s nothing fancy.

